> ## Documentation Index
> Fetch the complete documentation index at: https://crossmint-wallets-docs-2-5.mintlify.site/llms.txt
> Use this file to discover all available pages before exploring further.
# Client-side Keys
> How to create and use client-side API keys
## Create a Client-side Key
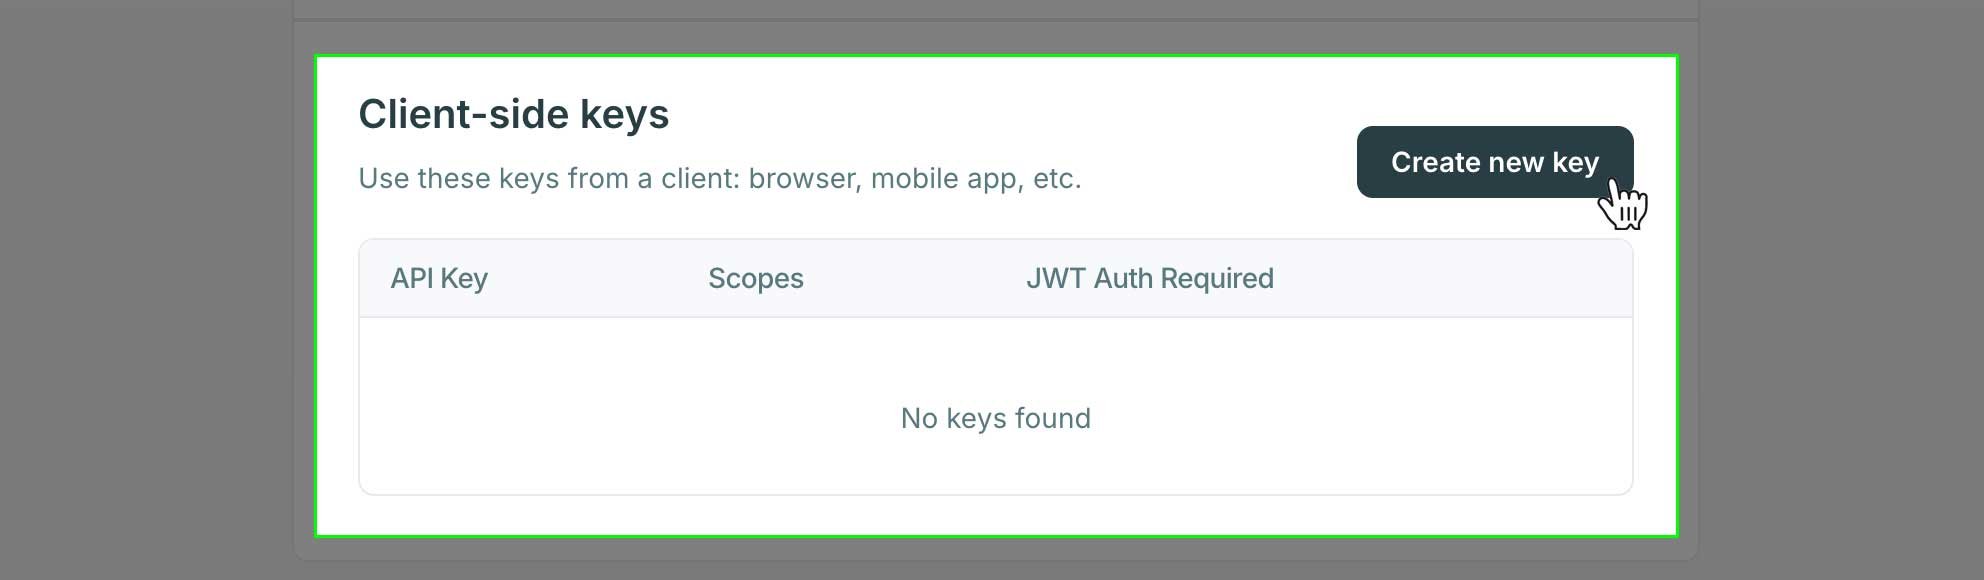
Navigate to the API Keys section of the developer console and click the "Create new key" button in the client-side keys section.
* [Staging API Keys](https://staging.crossmint.com/console/projects/apiKeys)
* [Production API Keys](https://www.crossmint.com/console/projects/apiKeys)
 ### Setting Authorized Origins
Client-side keys are exposed in the application and thus require additional security measures. The minimum requirement is to whitelist URLs that requests can be sent from. Client-side keys support two types of origins:
#### Web Origins
For web applications, you need to add the domains that requests will be sent from. In development, you'll need to add the local domain you test your application from. This is commonly `http://localhost` followed by a port number such as `3000`, `5173`, etc. For example, when developing with NextJS, the default origin you need to authorize is `http://localhost:3000`.
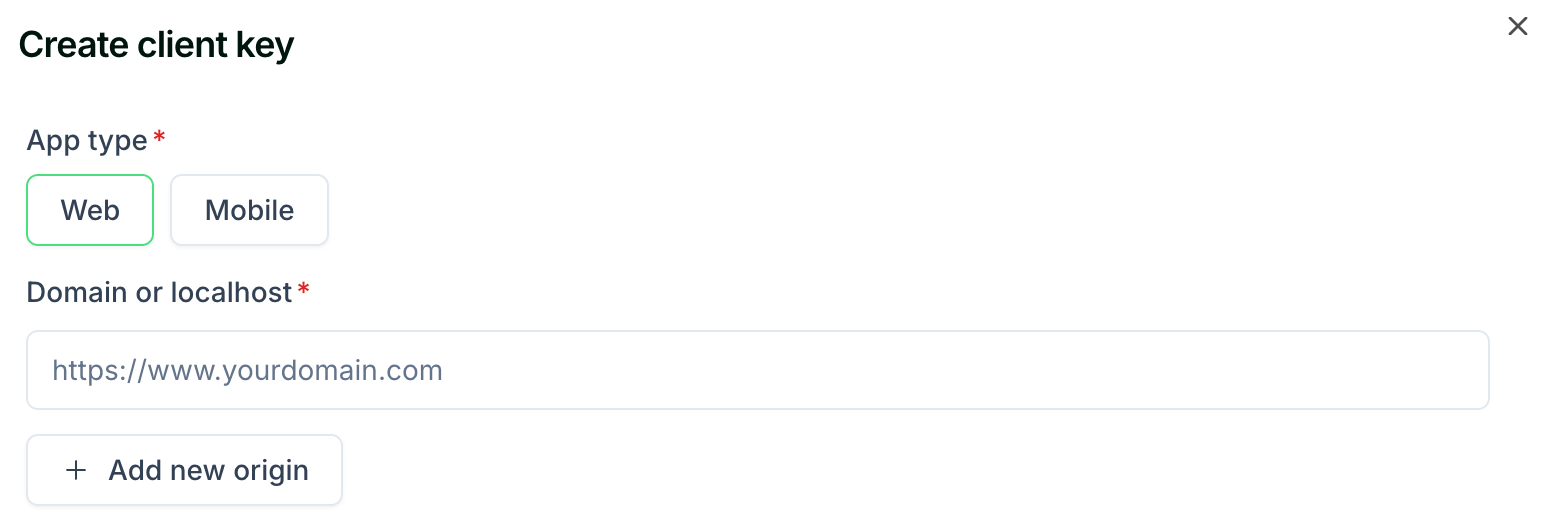
The expected format for web origins is a full URL with protocol, such as `https://www.yourdomain.com` or `http://localhost:3000`.
#### Mobile App Identifiers
For mobile applications, you need to add the bundle identifiers for iOS apps or package names for Android apps. The expected format is:
* iOS: Bundle ID (e.g., `com.company.appname`)
* Android: Package name (e.g., `com.company.appname`)
You can only register either web origins or mobile app identifiers for a single API key, not both. If you need both
types, you'll need to create separate API keys.
When you create a production API key you will need to authorize your production domain or app identifiers to use the API key. You can add multiple authorized domains or app identifiers for an API key to make requests from. Type in the domain or app identifier that you want to authorize and then click the "+ Add new origin" button.
### Setting Authorized Origins
Client-side keys are exposed in the application and thus require additional security measures. The minimum requirement is to whitelist URLs that requests can be sent from. Client-side keys support two types of origins:
#### Web Origins
For web applications, you need to add the domains that requests will be sent from. In development, you'll need to add the local domain you test your application from. This is commonly `http://localhost` followed by a port number such as `3000`, `5173`, etc. For example, when developing with NextJS, the default origin you need to authorize is `http://localhost:3000`.
The expected format for web origins is a full URL with protocol, such as `https://www.yourdomain.com` or `http://localhost:3000`.
#### Mobile App Identifiers
For mobile applications, you need to add the bundle identifiers for iOS apps or package names for Android apps. The expected format is:
* iOS: Bundle ID (e.g., `com.company.appname`)
* Android: Package name (e.g., `com.company.appname`)
You can only register either web origins or mobile app identifiers for a single API key, not both. If you need both
types, you'll need to create separate API keys.
When you create a production API key you will need to authorize your production domain or app identifiers to use the API key. You can add multiple authorized domains or app identifiers for an API key to make requests from. Type in the domain or app identifier that you want to authorize and then click the "+ Add new origin" button.
 ### Select Scopes
Within the modal that opens, toggle the required scopes you want to enable. You may need to expand an accordion for the product area you're working on to expose additional scope options.
### Select Scopes
Within the modal that opens, toggle the required scopes you want to enable. You may need to expand an accordion for the product area you're working on to expose additional scope options.
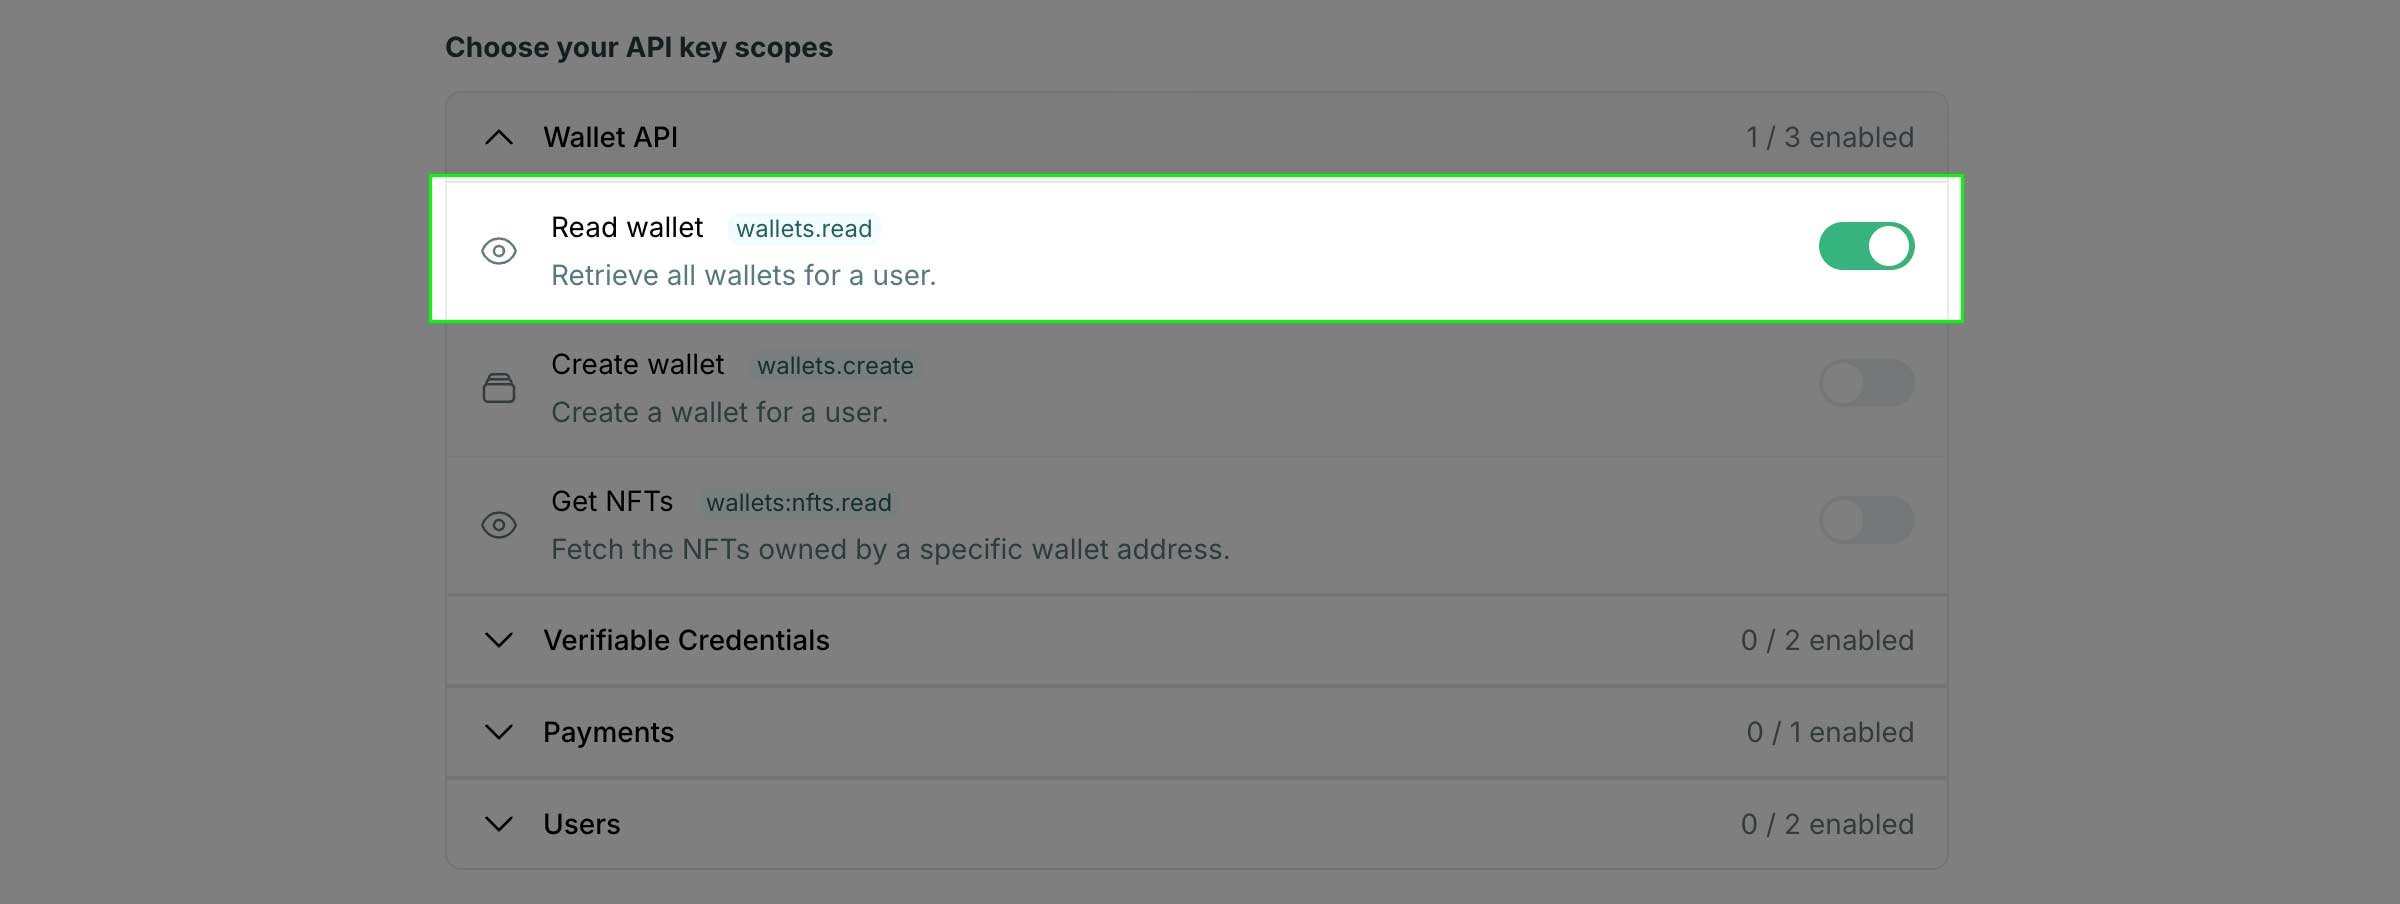 For more information on API Key scopes visit the scopes page or the API Reference.
Complete list of available API scopes
Detailed docs for all API endpoints
### JWT Authentication
Finally, select the option to require a JWT if your application or use case requires it. Enabing this setting will require that users are authenticated to permit API requests.
For more information on API Key scopes visit the scopes page or the API Reference.
Complete list of available API scopes
Detailed docs for all API endpoints
### JWT Authentication
Finally, select the option to require a JWT if your application or use case requires it. Enabing this setting will require that users are authenticated to permit API requests.
 The [Wallets SDK](/sdk-reference/wallets/overview) requires this option to be enabled. It is optional for other
client side APIs. For more information on the options, refer to the [JWT
Authentication](/introduction/platform/api-keys/jwt-authentication) section.
If you choose to enable the JWT Authentication for your client-side API key, there are additional configurations that must be made. You can choose between Crossmint authentication (easiest), third party auth providers such as Dynamic, Auth0, Stytch, Privy or Firebase (medium), or integrating with custom solutions where you generate your own JWTs (advanced).
You can find more information and guidance in the [JWT Authentication](/introduction/platform/api-keys/jwt-authentication) section.
***
## Using a Client-side Key
There are a few different approaches to using a client-side key. The most common option is passing it to the `init` function for a supported SDK. There are also some cases where you'll pass the key as a header in a raw API call from custom code, similar to how a server-side key works.
### Initializing an SDK
The most common way you'll leverage a client-side API key is by passing it to the `init` function for a supported SDK. See the examples below.
```typescript smartWalletInit.ts theme={null}
import { SmartWalletSDK } from "@crossmint/client-sdk-smart-wallet";
const sdk = SmartWalletSDK.init({
clientApiKey: process.env.NEXT_PUBLIC_CLIENT_SIDE_KEY,
});
```
```typescript credentialsInit.ts theme={null}
import * as sdk from '@crossmint/client-sdk-verifiable-credentials';
sdk.CrossmintAPI.init(process.env.NEXT_PUBLIC_CLIENT_SIDE_KEY);
```
```tsx authExample.tsx theme={null}
import { CrossmintProvider, CrossmintAuthProvider } from "@crossmint/client-sdk-react-ui";
export default function RootLayout({
children,
}: Readonly<{
children: React.ReactNode;
}>) {
return (
{children}
);
}
```
### Direct API Call From Client
The Headless Checkout is one example where you may be writing custom API calls from your application to create orders. In this case, you set the client-side API key as a header named `X-API-KEY`, much like you would when making a server-side API call.
```typescript theme={null}
const createOrder = async (orderInput: any) => {
try {
const res = await fetch(`https://staging.crossmint.com/api/2022-06-09/orders`, {
method: "POST",
headers: {
"Content-Type": "application/json",
"x-api-key": process.env.NEXT_PUBLIC_CLIENT_SIDE_KEY,
},
body: JSON.stringify(orderInput),
});
const order = await res.json();
setOrder(order.order);
setClientSecret(order.clientSecret);
} catch (e) {
console.error(e);
throw new Error("Failed to create order");
}
};
```
The [Wallets SDK](/sdk-reference/wallets/overview) requires this option to be enabled. It is optional for other
client side APIs. For more information on the options, refer to the [JWT
Authentication](/introduction/platform/api-keys/jwt-authentication) section.
If you choose to enable the JWT Authentication for your client-side API key, there are additional configurations that must be made. You can choose between Crossmint authentication (easiest), third party auth providers such as Dynamic, Auth0, Stytch, Privy or Firebase (medium), or integrating with custom solutions where you generate your own JWTs (advanced).
You can find more information and guidance in the [JWT Authentication](/introduction/platform/api-keys/jwt-authentication) section.
***
## Using a Client-side Key
There are a few different approaches to using a client-side key. The most common option is passing it to the `init` function for a supported SDK. There are also some cases where you'll pass the key as a header in a raw API call from custom code, similar to how a server-side key works.
### Initializing an SDK
The most common way you'll leverage a client-side API key is by passing it to the `init` function for a supported SDK. See the examples below.
```typescript smartWalletInit.ts theme={null}
import { SmartWalletSDK } from "@crossmint/client-sdk-smart-wallet";
const sdk = SmartWalletSDK.init({
clientApiKey: process.env.NEXT_PUBLIC_CLIENT_SIDE_KEY,
});
```
```typescript credentialsInit.ts theme={null}
import * as sdk from '@crossmint/client-sdk-verifiable-credentials';
sdk.CrossmintAPI.init(process.env.NEXT_PUBLIC_CLIENT_SIDE_KEY);
```
```tsx authExample.tsx theme={null}
import { CrossmintProvider, CrossmintAuthProvider } from "@crossmint/client-sdk-react-ui";
export default function RootLayout({
children,
}: Readonly<{
children: React.ReactNode;
}>) {
return (
{children}
);
}
```
### Direct API Call From Client
The Headless Checkout is one example where you may be writing custom API calls from your application to create orders. In this case, you set the client-side API key as a header named `X-API-KEY`, much like you would when making a server-side API call.
```typescript theme={null}
const createOrder = async (orderInput: any) => {
try {
const res = await fetch(`https://staging.crossmint.com/api/2022-06-09/orders`, {
method: "POST",
headers: {
"Content-Type": "application/json",
"x-api-key": process.env.NEXT_PUBLIC_CLIENT_SIDE_KEY,
},
body: JSON.stringify(orderInput),
});
const order = await res.json();
setOrder(order.order);
setClientSecret(order.clientSecret);
} catch (e) {
console.error(e);
throw new Error("Failed to create order");
}
};
```